Content Team
AI technology experts specializing in face swap research and digital content creation.
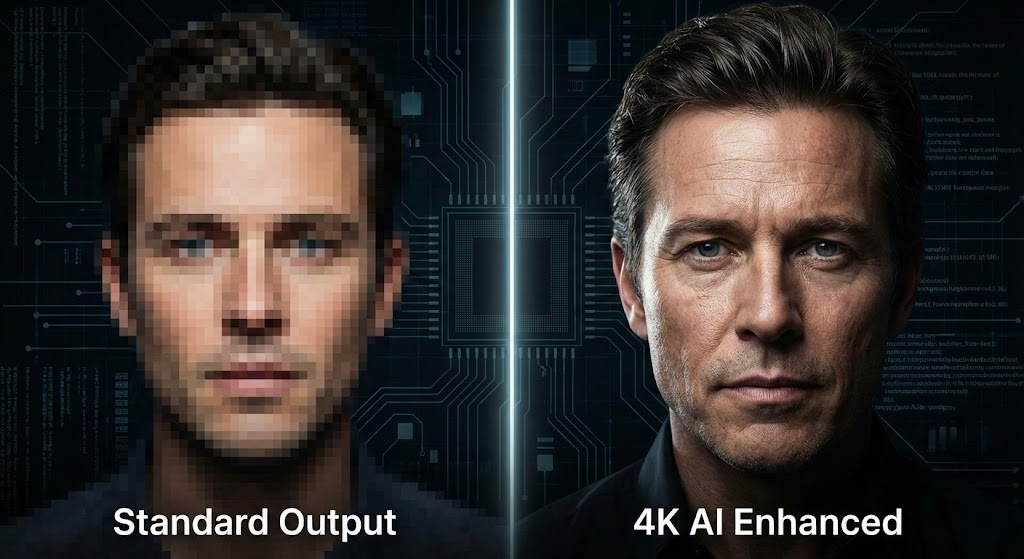
In the rapid development of digital content creation environment, if the final resolution is not clear enough for modern monitors, standard video face swap is often not enough. With the 4K display and mobile retina screen becoming normal, the "horror Valley" effect is usually not caused by the poor alignment of AI, but caused by the resolution mismatch - in a clear HD background, the exchanged face looks fuzzy. For creators, filmmakers and digital marketers, it is the Holy Grail to achieve high-quality face swap and retain the texture, texture and light of the original 4K lens. This guide will guide you to use the advanced tool suite of faceswap-ai.io, gradually complete the professional workflow, and demonstrate how to go beyond the basic deepfakes and produce theater level effects. We will not only explore the exchange process, but also the key preprocessing and post-processing steps involving video enhancer. These technologies truly distinguish between viral epidemic and pixel chaos.
For most users trying to use AI video tools, the main frustration is the decline in quality. You uploaded a clear 4K clip, but the final facial exchange looks soft, waxy or pixelated. To solve this problem, we must first understand the bottleneck. Most of the GAN used in the video face swap algorithm are trained on a specific resolution data set, usually limited to 512x512 or 1,024x1,024 pixels, to ensure the processing speed. When these generated faces are stretched to adapt to 4K frames (3,840x2,160), the pixel density will decrease significantly, resulting in visual differences. This is where the concept of "complete workflow" becomes crucial. It's not enough to just change faces; It is necessary to understand the integrity of the source lens.
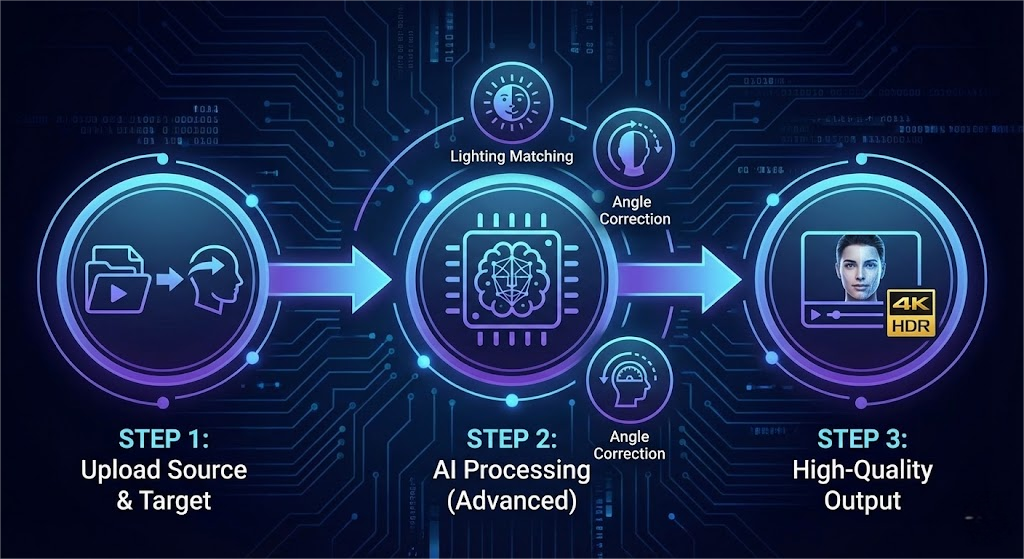
Before the beginning of the exchange process, the quality of the source video is crucial. If your original lens has a grain sense or compression artifact, it will be difficult for AI to accurately draw facial symbols. This is where the special video intensifier becomes your first line of defense. By running the original material through the AI enhancer before the exchange, you can effectively "clean the canvas", sharpen the edge and remove digital noise. This preprocessing step can ensure that the video face swap algorithm has the best data for use, so as to minimize tracking error and jitter. In addition, if you are dealing with complex composition, you may find that the background itself can distract. Using the video background remover can help you isolate the main body and pay more attention to the facial details before recombining the scene. In faceswap-ai.io, we give priority to this overall method, and understand that the result of reality is the sum of multiple high-precision parts.
Once your source lens is ready, the next stage is the actual implementation of the exchange. Using the 4K AI face changer requires more than just dragging and dropping files; It needs to have a keen eye for "source target compatibility". The target face (the face to be inserted) must share similar lighting conditions and angles with the source video. If your video has dramatic side lights (light and shade contrast), but your target photo is a passport photo with flat light, even the best AI is difficult to truly integrate it. On faceswap-ai.io, our advanced algorithm aims to deal with light adaption, but it's a professional skill to help AI by selecting the right input.
When you start the video face swap, the AI will perform the face landmark detection and map the 3D geometry to the 2D video plane. At this stage, continuity is the key. One of the common problems of amateur deepfakes is "flicker", that is, the face disappears when it moves fast or blocks (like a hand waving in front of the face). Our platform uses the time consistency module to reduce this flicker. But if your goal is a creative turn - maybe a complete change of the scene - you can use the video background remover to place your subject in a new environment, or even use the video character replacement tool to change the body type before exchanging faces. This modular feature allows creators to build scenes from scratch. For example, you can shoot a scene in the living room, remove the background, put yourself on a science fiction spaceship, and then exchange your face with a fictional alien character. The versatility of the toolset means that your creativity is the only limit, as long as you adhere to the principle of lighting and perspective matching.
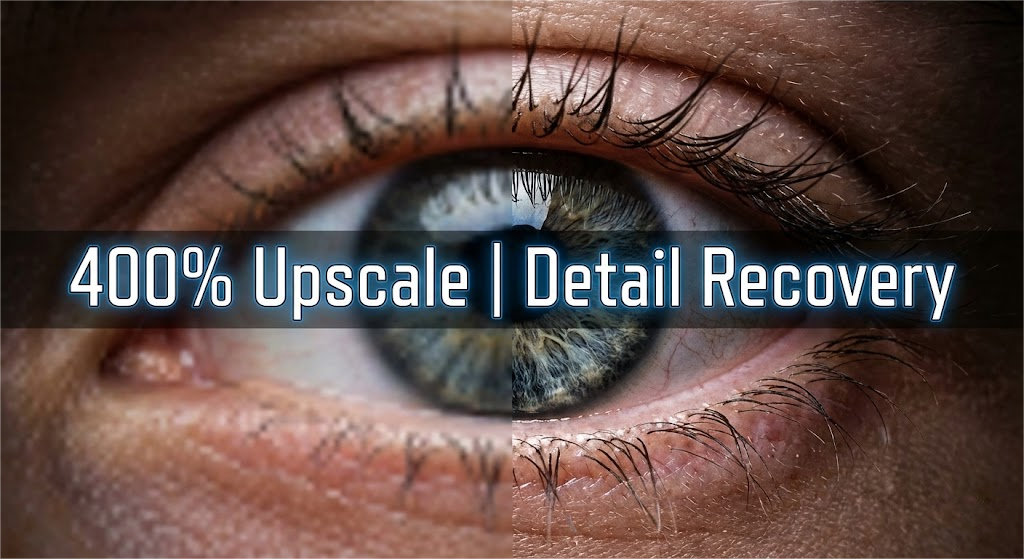
This section reveals the "secret recipe" of professional AI artists. Even if the best high-quality face swap settings are used, the skin texture may be smoothed in the generation process, making the main body look a bit artificial or "airbrush". In order to restore the roughness, pores and realism of 4K, it is non-negotiable to use the video upgrader for post-processing. This is different from the video intensifier we used in the first step; The intensifier cleans up the input and the upgrader polishes the output.
After downloading the exchanged video from faceswap-ai.io, you should immediately re upload it to the video upscaler tool. The tool uses super resolution GAN (generate countermeasure network) to generate reasonable details that did not exist before. It analyzes the context of the image - recognizing "this is the skin", "this is the eyebrow", "here is the hair" - and injects high-frequency details accordingly. This step transforms the soft 1,080p output into a sharp 4K masterpiece. It reminds people of the reflection in the eyes and the subtle flaw that makes the face look like a human. If you are also using static resources, such as thumbnails of videos, use the image enhancer to follow the same logic. The goal is consistency. You can't have a 720p 4K background. By integrating the video scaler into your mandatory workflow, you can ensure that the exchanged face matches the pixel density of the original high-end lens, making the editing almost impossible to be detected by the naked eye.
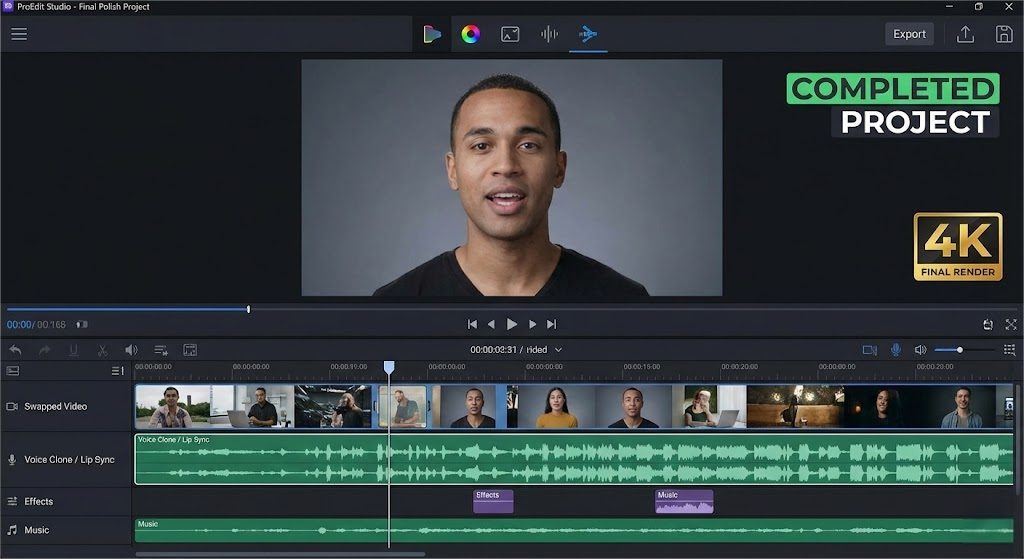
Visual fidelity is only half the success. In order for video face swapping to be truly convincing, the audio and facial expressions must be perfectly aligned. A common feature of fake videos is' lip drift ', where the mouth movements do not match the spoken language, especially if the chin structure of the new face is different from that of the original actor. Although faceswap ai. io is proficient in handling visual mapping, advanced users typically take the final step of audio optimization. If you want to significantly change the speaker's identity, consider using voice clone tools to generate new audio that matches the exchanged facial characters.
Once the sound is produced, using the lip sync tool can ensure that the mouth movements of the newly exchanged face are fully driven by the audio track. This creates a cohesive sensory experience. In addition, subtle differences can be adjusted. Perhaps the original actor didn't laugh enough, or looked away at the wrong moment. Emerging tools like face expression changer allow for these fine adjustments after exchange, allowing you to have direct control over your performance. Finally, before clicking publish, please ensure that your video is clean. If you use stock shots with unwanted logos, a watermark remover may be the final step in professionalizing your editing. By combining high-quality face swapping with precise lip sync, voice cloning, and final cleaning, you are not just "swapping faces" - you are synthesizing a brand new, trustworthy digital reality. This comprehensive approach, supported by the full set of tools from faceswap-ai.io, is where casual meme creators are distinguished from professional content creators.
Expert Review: This article was written by Alex Carter, our editorial team.
Methodology: All product comparisons and reviews are based on hands-on testing and independent research. We may earn affiliate commissions (at no extra cost to you) from some links.
Last Updated: November 28, 2025